Selfie Button as a Presentation Clicker
How to configure a "Selfie Stick" bluetooth remote control as a remote control for a presentation.
Selfie Stick Button
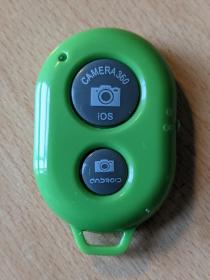
A while ago I had the idea of using a “Selfie Stick” remote control for presentations. It is a Bluetooth device with two buttons. That’s plenty to step forward and back through your slides.
The problem that needs to be solved is to remap the buttons so the keys generated control the presentation.
It was actually 7 years ago that I spent £2 on the purchase of this device, but I only recently performed the R&D to get this working. This article describes how it was achieved, and should be generalisable to other similar bluetooth devices.
The following instructions used Debian 11 (Bullseye), but should also work with any distribution using SystemD’s Hardware Database and X.org server.
For the avoidance of doubt, I have never owned a selfie stick.
Pairing as input device
The first step is to pair the device with your computer. I used bluetoothctl
(from the bluez package) to achieve this, but you could also use the GUI.
- Use the
scancommand to identify the MAC address of the device - Use the
paircommand to pair with the device - Use the
trustcommand so it will connect automatically
$ bluetoothctl
Agent registered
[bluetooth]# scan on
Discovery started
[CHG] Controller D0:DF:9A:B6:F0:30 Discovering: yes
[NEW] Device 12:30:00:20:76:42 AB Shutter 3
[bluetooth]# pair 12:30:00:20:76:42
Attempting to pair with 12:30:00:20:76:42
[CHG] Device 12:30:00:20:76:42 Connected: yes
[CHG] Device 12:30:00:20:76:42 Modalias: usb:v04E8p7021d011B
[CHG] Device 12:30:00:20:76:42 UUIDs: 00001124-0000-1000-8000-00805f9b34fb
[CHG] Device 12:30:00:20:76:42 UUIDs: 00001200-0000-1000-8000-00805f9b34fb
[CHG] Device 12:30:00:20:76:42 ServicesResolved: yes
[CHG] Device 12:30:00:20:76:42 Paired: yes
Pairing successful
[CHG] Device 12:30:00:20:76:42 WakeAllowed: yes
[CHG] Device 12:30:00:20:76:42 ServicesResolved: no
[CHG] Device 12:30:00:20:76:42 Connected: no
[bluetooth]# trust 12:30:00:20:76:42
[CHG] Device 12:30:00:20:76:42 Trusted: yes
Changing 12:30:00:20:76:42 trust succeeded
[CHG] Device 12:30:00:20:76:42 RSSI: -55
[bluetooth]#
Events
The device should now be connected, and will send events when the buttons are pressed. I found that the iOS button generated a “Volume Up” keypress, and the Android button generated an “Enter” keypress.
The next step is to identify the input devices, and the events that they send.
For this you will need the xinput and evtest packages installed.
The command xinput list will show all input devices. You should see the
inputs corresponding to the bluetooth device.
$ xinput list
⎡ Virtual core pointer                          id=2    [master pointer  (3)]
⎜   ↳ Virtual core XTEST pointer                id=4    [slave  pointer  (2)]
⎜   ↳ AlpsPS/2 ALPS DualPoint TouchPad          id=13   [slave  pointer  (2)]
⎜   ↳ AlpsPS/2 ALPS DualPoint Stick             id=14   [slave  pointer  (2)]
⎜   ↳ AB Shutter 3 Mouse                        id=19   [slave  pointer  (2)]
⎣ Virtual core keyboard                         id=3    [master keyboard (2)]
    ↳ Virtual core XTEST keyboard               id=5    [slave  keyboard (3)]
    ↳ Power Button                              id=6    [slave  keyboard (3)]
    ↳ Video Bus                                 id=7    [slave  keyboard (3)]
    ↳ Power Button                              id=8    [slave  keyboard (3)]
    ↳ Sleep Button                              id=9    [slave  keyboard (3)]
    ↳ Laptop_Integrated_Webcam_FHD: I           id=10   [slave  keyboard (3)]
    ↳ Dell WMI hotkeys                          id=11   [slave  keyboard (3)]
    ↳ AT Translated Set 2 keyboard              id=12   [slave  keyboard (3)]
    ↳ ACPI Virtual Keyboard Device              id=15   [slave  keyboard (3)]
    ↳ AB Shutter 3 System Control               id=16   [slave  keyboard (3)]
    ↳ AB Shutter 3 Consumer Control             id=17   [slave  keyboard (3)]
    ↳ AB Shutter 3 Keyboard                     id=18   [slave  keyboard (3)]
I was surprised to see the device registered as 1 pointer device and 3 keyboard devices. More than is required for just 2 buttons!
The next step is to identify the scan codes sent by the buttons. The evtest
command will first prompt for input to display events for.
$ sudo evtest
No device specified, trying to scan all of /dev/input/event*
Available devices:
/dev/input/event0:      AT Translated Set 2 keyboard
/dev/input/event1:      Lid Switch
/dev/input/event2:      Power Button
/dev/input/event3:      Sleep Button
/dev/input/event4:      Power Button
/dev/input/event5:      Video Bus
/dev/input/event6:      AlpsPS/2 ALPS DualPoint Stick
/dev/input/event7:      AlpsPS/2 ALPS DualPoint TouchPad
/dev/input/event8:      PC Speaker
/dev/input/event9:      Dell WMI hotkeys
/dev/input/event10:     Laptop_Integrated_Webcam_FHD: I
/dev/input/event11:     HDA Digital PCBeep
/dev/input/event12:     HDA Intel PCH Dock Mic
/dev/input/event13:     HDA Intel PCH Mic
/dev/input/event14:     HDA Intel PCH Dock Line Out
/dev/input/event15:     HDA Intel PCH Headphone
/dev/input/event16:     HDA Intel PCH HDMI/DP,pcm=3
/dev/input/event17:     HDA Intel PCH HDMI/DP,pcm=7
/dev/input/event18:     HDA Intel PCH HDMI/DP,pcm=8
/dev/input/event19:     ACPI Virtual Keyboard Device
/dev/input/event20:     AB Shutter 3 Mouse
/dev/input/event21:     AB Shutter 3 Keyboard
/dev/input/event22:     AB Shutter 3 Consumer Control
/dev/input/event23:     AB Shutter 3 System Control
Select the device event number [0-23]:
When you have selected the input device, evtest will display the events the
device can generate, and enter a testing phase where it displays the events
when they are generated If you know the device, then you can specify that as an
argument instead of selecing from ths list).
Here is the output from the “AB Shutter 3 Consumer Control” when the iOS button is pressed
# evtest /dev/input/event22
Input driver version is 1.0.1
Input device ID: bus 0x5 vendor 0x4e8 product 0x7021 version 0x11b
Input device name: "AB Shutter 3 Consumer Control"
Supported events:
  Event type 0 (EV_SYN)
  Event type 1 (EV_KEY)
    Event code 113 (KEY_MUTE)
    Event code 114 (KEY_VOLUMEDOWN)
    Event code 115 (KEY_VOLUMEUP)
    Event code 116 (KEY_POWER)
    Event code 150 (KEY_WWW)
    Event code 152 (KEY_SCREENLOCK)
    Event code 161 (KEY_EJECTCD)
    Event code 163 (KEY_NEXTSONG)
    Event code 164 (KEY_PLAYPAUSE)
    Event code 165 (KEY_PREVIOUSSONG)
    Event code 172 (KEY_HOMEPAGE)
    Event code 217 (KEY_SEARCH)
    Event code 240 (KEY_UNKNOWN)
    Event code 581 (KEY_SCREENSAVER)
  Event type 3 (EV_ABS)
    Event code 40 (ABS_MISC)
      Value      0
      Min        0
      Max        1
  Event type 4 (EV_MSC)
    Event code 4 (MSC_SCAN)
Properties:
Testing ... (interrupt to exit)
Event: time 1638474453.119478, type 4 (EV_MSC), code 4 (MSC_SCAN), value c00e9
Event: time 1638474453.119478, type 1 (EV_KEY), code 115 (KEY_VOLUMEUP), value 1
Event: time 1638474453.119478, -------------- SYN_REPORT ------------
Event: time 1638474453.119547, type 4 (EV_MSC), code 4 (MSC_SCAN), value c00e9
Event: time 1638474453.119547, type 1 (EV_KEY), code 115 (KEY_VOLUMEUP), value 0
Event: time 1638474453.119547, -------------- SYN_REPORT ------------
I found the Android button associated with the “Keyboard” input.
# evtest /dev/input/event21
Input driver version is 1.0.1
Input device ID: bus 0x5 vendor 0x4e8 product 0x7021 version 0x11b
Input device name: "AB Shutter 3 Keyboard"
[Supported events detail removed]
Testing ... (interrupt to exit)
Event: time 1638474488.591502, type 4 (EV_MSC), code 4 (MSC_SCAN), value 70028
Event: time 1638474488.591502, type 1 (EV_KEY), code 28 (KEY_ENTER), value 1
Event: time 1638474488.591502, -------------- SYN_REPORT ------------
Event: time 1638474488.620523, type 4 (EV_MSC), code 4 (MSC_SCAN), value 70028
Event: time 1638474488.620523, type 1 (EV_KEY), code 28 (KEY_ENTER), value 0
Event: time 1638474488.620523, -------------- SYN_REPORT ------------
There were no events generated by the “AB Shutter 3 Mouse” or “AB Shutter 3 System Control” inputs.
Change Mapping of Buttons
The details needed are the name of the input device, the scan code generated by
the button (see MSC_SCAN above), and the name of the key event you would like
instead. One way to identify the valid key names is to look for the KEY_*
definitions in input-event-codes.h header file.
For my use I mapped c00e9 on “AB Shutter 3 Consumer Control” to be the right
arrow (“next slide please”), and mapped 70028 on the “AB Shutter 3
Keyboard” to be the left arrow.
I created a hwdb file with the desired mapping.
# cat /etc/udev/hwdb.d/70-keyboard.hwdb
evdev:name:AB Shutter 3 Consumer Control:dmi:*
 KEYBOARD_KEY_c00e9=right

evdev:name:AB Shutter 3 Keyboard:dmi:dmi:*
 KEYBOARD_KEY_70028=left
To reload the configuration change to test
$ sudo systemd-hwdb update
$ sudo udevadm trigger -s input
Key Press Repeating
I had one problem after mapping the buttons. The buttons would tend to stick and then autorepeat. This could lead to presentations leaping ahead uncontrollably. I think this is a reflection on the price I paid for the device.
I’ve not found a way to disable the autorepeat for just this device, but I can
use xset to disable it for just these two keys. This command has to be run
after the device is paired.
I need to know the X keycode for the buttons. Use xinput with the ID of the
input device (see previous output of xinput list) to show the keycode when
the button is pressed.
$ xinput --test 17
key press   113
key release 113
^C
$ xinput --test 15
key press   114
key release 114
^C
To get the xset command run when the device is connected, I selected one of
the input names, and the MAC address (in lower case) to trigger when it was
added.
$ cat /etc/udev/rules.d/99-clicker.rules
ACTION=="add" SUBSYSTEM=="input", \
    ATTRS{name}=="AB Shutter 3 System Control", \
    ATTRS{phys}=="d0:df:9a:b6:f0:30", \
    PROGRAM="/usr/bin/env XAUTHORITY=/var/run/lightdm/root/:0 DISPLAY=:0 /usr/bin/xset -r 113 -r 114"
Ubuntu with Wayland
I briefly looked into how this would work with Wayland on Ubuntu.
It looks like there are tools that will permit the querying of the events generated, but as one of the input devices was not detected, I didn’t proceed any further.
I did verify that using the hwdb configuration file created using this process did work (for the one button that was working).